

There are plenty of tutorials out there for making these, but here are my links and extra tips:
- This tutorial gave me the idea for the different lines and squares designs on the tops of the coasters.
When they sew the top stitching on to the top piece either side of the coloured squares, they use an ordinary straight stitch. I found using my machine's straight triple stitch function looked even better.
 |
| This is my coaster with the triple stitch either side of the panels. You can see how its a bolder look than the singlestraight stitch on the edge. |
- This is where I first saw the design - these are made out of tea towels which is a great idea. Gives a thicker more robust finish that the cotton I used. But obviously depends if you have any nicely printed tea towels that you don't want any more.

- Quilting the coasters in concentric squares or other design, especially if using one print or plain fabric only, can look good but can be difficult to get evenly spaced if you're just beginning so practise first. (My new machine comes with a little quilting bar attachment that I'm assuming helps to line things up? But haven't tried it out yet. Will have to look into it - let me know if you know anything about this!)
- Make a few before you get on to the ones you want to give away. It took me a few tries to get better at getting them even and neat, getting evenly spaced stitching/quilting on the top and working out the kinks in designs. I wasn't following a specific pattern, so if you make up your own designs you might come across things that do/dont work so well.
- If you don't have/ don't want to buy the wadding to put in between, you can use other things like felt or cut up a unused flannelette sheet or pillowcase (which is what I did.)
However, I have seen some people make them with Peltex or similar in the middle to make the more durable, though haven't tried this.
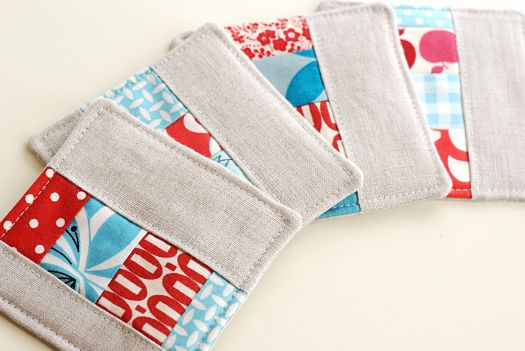
- Bold fabrics - like the blue and white fabric on the blue and red coasters below - hide mistakes well, from uneven stitching even to your coaster being not quite square.

These are the six designs I've made so far to give as gifts to friends. I tried to pick prints and colours that would go well with their personalities or house decor.
If you make any and have more tips or tricks, comment below!! Happy sewing.


